The packages have been opened, the ooohs! and aaahs! are over, and now I can talk about the projects I completed! I didn’t post ahead of time because my children, parents and other recipients check out my blog more frequently than I realized until this Thanksgiving! So rather than spoil their Christmas, I just kept quiet. But now I can show everyone what I did this fall!
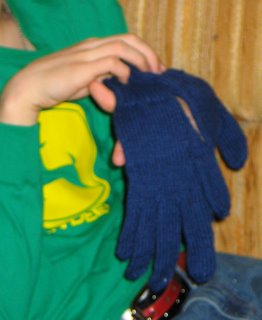
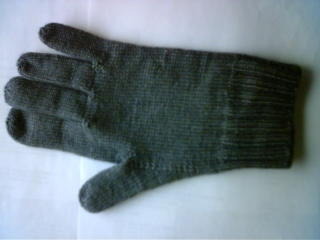
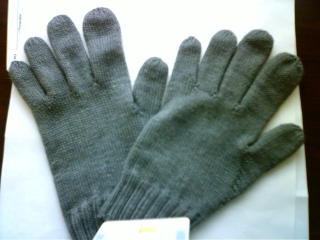
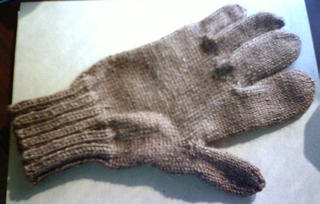
I did lots of gloves this year. Gloves for my husband, sons, mother and mother-in-law and gloves for myself (see the October 25 posting). I used Knit Picks’ Andean Silk for my husband and my older son, who is currently living in the northeast (courtesy of the US government). I also used another Knit Picks yarn – their merino Sock Landscape in the Cape Cod colorway was the choice of my younger son. I used Debbie Bliss cashmerino for my mother and mother-in-law, and made them each a sinfully soft pair of DK-weight gloves.
Knitting gloves for a person gives ample time for reflection and prayer. I thought about my DH’s large, seemingly clumsy hands that have always been gentle, whether changing a diaper on a small child or helping up a stumbling spouse. My husband is a quiet man who is the center of our family – we all revolve around his laughter and kindness.
My mother’s hands are beginning to show the signs of the arthritis that has become the bane of her seventh decade. RA is a great deal more than a television commercial if you’re living with it every day. Yet she continues to spend her time doing for other people, either family members or members of her church family. Her hands are competent, sturdy and graceful despite the swollen joints.
My mother-in-law has very small hands that belie the strength within her small frame. She taught special education for decades, and is now spending her time serving her family and church family. She only grudgingly gives in to the restraints her body is beginning to impose.
My older son has flown the nest. The Navy suits him; he’s happy and busy and learning new things every day. His hands have toughened since June; the palms are broader, the fingers stronger and new callouses have formed. My best Christmas gift was to have him home this year. It was a bittersweet time, since I realized just how little he still needs us. But he has the maturity, sweetness and grace to pretend otherwise, and I’m so proud of him.
My younger son is straining toward the door. He’s a senior in high school, anxious to go on to his next challenge. His hands are a combination of his father’s and my own – a broad palm with long, tapered fingers that always move gracefully. He’s a graceful young man, with a bit of salt mixed in with his sweetness. He’s both the athlete and the musician of the family, and I can’t wait to see where his talents and drive take him.
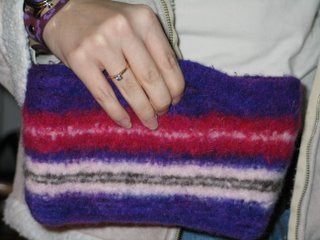
I also did purses – one for a young friend, one for my older son’s fiancĂ©, and one for my younger son to give. Those are fun, since fulling the finished knitting hides any ‘mistakes’ and intensifies the colors and textures. They’re a fast knit compared to something more detailed, and fitting is quite flexible. Purple is ‘in’ right now for young ladies, and since I also love purple, these small bags were simply a pleasure to make.
My daughter has definitely flown the nest. She married this year, and her Christmas was given early so that she could spend the day with her new husband. I did a hat, scarf and purse for her from some thick and thin wool novelty yarn. Hopefully it will keep her warm and remind her that we all love her while she’s creating a new family life. I miss the younger and teen-age years, and wish her all the best in her new adult life.
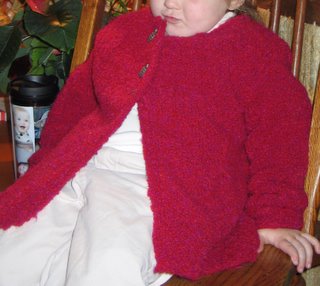
Then there were the sweaters, made for the grandchildren. A tradition seems to be in the making. This year's offerings: A fun alpaca boucle´ with pewter buttons in the shape of a turtle dressed my granddaughter in high style.
My grandson got a more traditional look. I’ve loved Elizabeth Zimmerman’s commonsense approach to knitting for a long time, and decided to make her Tomten Jacket for my toddler boy this year. His young complexion looks best in neutrals and bright colors, so I used Knit Picks’ natural Wool of the Andes, trimmed in handspun brown Shetland wool dyed with cherry kool-aid. The toughest thing was putting in the zipper – machine-sewing zippers doesn’t bother me at all, but hand-sewing in knitted fabric took all my courage! I followed EZ's toddler-size pattern, and can only assume that Elizabeth’s children were larger than my own! However, he’ll grow into it in no time at all.
As for my own gloves – I spent a great deal of their knitting time praying for patience and healing. It’s been a difficult year from several standpoints. My husband still continues to look for work, my daughter has presented us with her own set of challenges, and my son’s departure for the service was difficult emotionally, even though it was a good decision for him. But I look forward to 2006 with hope for a wonderful year.
I wish you all a happy 2006, filled with love and joy and peace and fiber!
Tuesday, December 27, 2005
Thursday, December 01, 2005
Gifting Handmade Items – A Manifesto!
It’s the time of year when many of us have either started or completed several handmade items as gifts. I’ve been following several discussions on the Knitter’s Review forum (http://www.knittersreview.com/forum/) with interest and, in some cases, horror. Here’s my own two-cents’ worth on the subject.
Your handmade gifts are wonderful expressions of caring – you’ve thought about what fiber, yarn, color and technique will suit the recipient and you’ve thought about and prayed for that person as you made the gift. You’ve put much time and at least some money into the gift, and anticipated the recipient’s delight upon opening it. You’ve invested a good bit of yourself in this gift, and exercised (and in some cases stretched) your talents to make it.
Let’s leap forward a bit. It’s gift-exchange time, and the recipient is opening the gift. If you’ve chosen the recipient well, you’ll get a delighted squeal or a heartfelt ‘thank you so much’. But if you’ve chosen to lavish your time and talent on an unappreciative person, their reaction may be downright hurtful. What do you do when the recipient doesn’t appreciate your time, energy, talent and money?
Opinions vary, of course. Some say just don’t make that person anything again – buy them whatever you can afford (even if it’s only a token gift). Others suggest that you explain why you chose to make the gift, sure that the recipient will appreciate your effort if it’s only explained to them – slowly, lovingly and using very simple words.
Explanations and excuses abound – depression-era adults or those raised in poverty feel that ‘handmade’ equates to ‘poverty’, and either feel insulted or uncomfortable that you felt it necessary to make their gift. Kind people insist that the ungrateful recipient simply doesn’t understand the effort and love, or is jealous of your skills. Perhaps those are explanations of a sort, but a simple “thank you” delivered in a sincere tone isn’t too much to ask in return for any gift!
Sometimes education does help – it did with my mother-in-law, a product of the Depression. She hid my gifts to her for several years, although she was always polite enough to acknowledge them gracefully. I finally got the message and started giving her purchased items only because she WAS my mother-in-law; then several of her friends saw things I’d made her and raved. Suddenly she wants only handmade gifts from me and brags about my skills to those same friends.
Sometimes education doesn’t help at all – I have one family member who will never receive another gift from me beyond a holiday greeting card. He simply didn’t appreciate the effort or the skill – he’s one of the unfortunates for whom money is the only measure. The only thing you can feel for these poor souls is pity; don’t lavish your time and skill on them again!
I’m probably in the minority but I think that poor manners are exactly that – poor manners. Rather than purchase anything for an ungrateful so-and-so, I’ll strike them from my gift list entirely! Harsh? Perhaps so. But I still feel that it’s the best way to handle it if at all possible. Sure, sometimes you just can’t do that – like my mother-in-law. If I’d stopped gifts to her entirely my darling husband would have been justifiably upset.
I have many people for whom I do make things – most of them in my immediate family, although one or two are especially good friends. I make their gifts because they understand and appreciate the love and skill involved. They are awed and delighted that I make the time in my busy life to do something especially for them. I make these gifts joyfully and with love in every inch.
But herewith find my own personal manifesto! I declare my freedom from guilt! I will no longer force myself to make something for those who do not appreciate the effort, no matter who asks me to do so. And if I don’t have the spare cash to buy a relative something, I’ll simply put a card under the tree and again refuse to feel guilty! The shortcoming is theirs, not mine, and the responsibility for modifying their attitude is also theirs. So be it!
Now where did I put that pattern and yarn…
Wednesday, November 23, 2005
Making a Spinner
What makes a spinner? Is it the best wheel, the best fiber, the most skeins sitting in baskets, the most classes taken, or what? How about the best spinners? What lets them effortlessly produce miles of beautiful yarn, either perfectly even or beautifully textured?
Do you think obsessing about the details of spinning is silly, and just want to sit down and spin yard after yard of singles as meditation or just for fun? That’s fine if it’s what you want; it’s hard to beat spinning as fiber therapy. Like the other fiberarts, there’s room in spinning for everyone. But if you want to continue to grow and evolve your spinning, this may give you a starting place.
I’ve been thinking over what makes a good spinner lately. I’ve been mentoring a group of beginners, and another of intermediate spinners, and it’s making me take a good hard look at my own spinning, and recognize my strengths and shortcomings. I’ve also been looking back over my evolution as a spinner for hints as to how those shortcomings developed and how I might correct them.
I’m a largely self-taught spinner. I had some wonderful help getting started, but after that first lesson I was pretty much on my own from one guild meeting to the next. So I did a lot of strange, wacky things to get the yarn I wanted with the tools I had, and “re-invented the wheel” more than someone who had the time and money and place to go for weekly classes or a week-long workshop.
Does that make self-teaching the best alternative? No, not necessarily. Like your spinning style, your learning style is individual to you. Was it the best alternative for me? Probably. I was very short of money, but had plenty of time and local sources of good, yet inexpensive fiber. Add in the fact that I’ve always preferred to spin fine, and you’ll see that I could get quite a lot of yardage from a $5 pound of raw wool! I also like to puzzle out things with the aid of a book or video, and find another person quite distracting to the process. So learning on my own was best for me.
I do sometimes wish I’d had the luxury of taking classes in basic and intermediate spinning techniques – I might have progressed faster, and found it easier to spin large amounts of yarn to exactly the same grist. I can do that now, but a class might have made it easier and cost less in time and ‘wasted’ wool.
On the other hand, if you can only learn something by watching someone else do it and asking questions, by all means take a class or ten, rent or buy appropriate videos/DVD’s and plant yourself and your wheel in front of the screen, or watch all the members in turn at local guild meetings. If you want to learn, find the way YOU learn best and then do whatever it takes to get it into your head and fingers.
As for the best equipment - I noticed at my first regional fiber festival that many of what I considered the best spinners used simple equipment. Again, it depends on the person. I love gadgets, and have tried many, and re-sold most of them. I like very fine, worsted-spun yarns. So the drum carder, while a great learning experience for about six months, sat unused in a corner of my studio for the next two years until a spinner came along who wanted one. She likes to spin worsted-weight woolen yarns for sweaters, and loves this tool. I’m sure it’s happier being used regularly.
But even the right tools for the job may not be right for you. I now have two sets of wool combs, down from four. I love the fiber prep that I get from 4- and 5-pitch English combs, but my arms and hands hurt for days after I use them for even a half-hour. (What can I say - my body is aging faster than my mind.) So I do an extra transfer pass on the double-pitch Vikings or the hand-held Forsythe combs and comb pain-free. Sure it’s a trade-off – most of life is, I’ve noticed. This is one trade-off I can live with.
Other gadgets I use frequently are a set of Allen wrenches in sizes for my wheels, an oil-bottle with a long needle, a real flicker instead of a dog-brush, and a small metal dog-comb with a long shaped handle. Gadgets that are occasionally useful include a set of half-size cotton cards and a spinning lap-cover I made from two colors of duck cloth. One side is white; the other is a medium-value blue, and the cloth makes it easier to spin dark or light fibers even in artificial light.
I have copious amounts of illusion netting in a neutral color – not quite white, but almost. Why? To wash those fine fleeces I love easily and properly in bulk. Do I use it? Not very often. I prefer washing a lock at a time. That way I get to make sure each lock is squeaky-clean and get a bonus of being able to fondle the fiber a bit more.
But we’ve wandered afield. What makes a spinner the best? Not necessarily classes, although they can certainly help and should be taken whenever possible. Not necessarily gadgets, although some are useful and some essential, depending on what you want to spin. What about an expensive wheel? Pleeeeease!
I currently own 3 spinning wheels. None are Rolls-Royces or Cadallics, only one might be termed a Buick. All three, to my mind, are steady, reliable and adaptable basic Toyotas. The Ashford Traveller was my second wheel. I didn’t learn the basics on this wheel – I could make yarn after a fashion before I got it – but it was my learner wheel nonetheless. I learned to spin a variety of fibers on this wheel, and learned the basics of keeping a wheel and spinner happy with it. I seldom spin on it any longer, but my 17-year-old son loves this wheel and has appropriated it. He’s not an everyday spinner, but nonetheless likes spinning well enough to assess college dorms by whether they have room for the wheel or not.
My workhorse is my Majacraft Rose. I fell in lust with this wheel when I saw a picture of it. But I couldn’t afford it! I kept spinning on the Traveller, and finally saved enough pennies. At SAFF two years later I sat down at a Rose, pockets stuffed with fine fluff and ready to fall in love. Talk about disillusion - I hated the wheel! Hard to treadle, jerky action, all the worst possible attributes for a dedicated fine-yarn spinner. I’m sure my face presented a picture! I left SAFF that year with a Majacraft Suzie Pro. Same family, but not the wheel I thought I’d be bringing home!
Suzie was a nice little workhorse, and in many ways I became a good spinner on her, spinning many different fibers and grists. I never really loved her, though. She was a tool, but not a partner, if you see what I mean. I still loved the look of the Rose, but couldn’t get past my horrible test-spin. Then I visited another vendor in a town nearby and in conversation described my experience with the Rose. She was horrified, since the Rose was her favorite wheel. It didn’t take long to figure out what the problem must have been. In the chaos of setting up a booth, the SAFF vendor must have reversed the treadle shafts. When we did the same thing on her Rose, it behaved exactly as I remembered.
I left the shop that day without Suzie, and with a brand-new Rose. Yep, I had the Suzie and all her stuff in the van (I was in the neighboring town to do a demonstration), and we traded – my almost-new Suzie for a brand-new Rose (plus a hundred dollars or so). We put it together before I left, so I was sure it worked properly, and I spent almost as much again on fiber to keep my new Rosie happy. I didn’t even look at another wheel for several years after that. Rosie and I were happy, and we spun everything together. My first cashmere (almost drove me crazy until I learned how to spin it), my first gossamer two-ply for my first full-size shawl for my first grandchild, my first worsted-weight singles were spun on Rosie. I never thought about getting another wheel, although sometimes Rosie was a bit modern-looking for demonstrations.
Then, again at SAFF, I saw my first Kromski Polonaise. “Truly beautiful wheel – shame it’s a single-treadle” summed up my reaction. Then they introduced the Symphony. I stopped buying fiber and started saving for another wheel. Syndy (I know, but I name all my wheels) arrived one spring evening about six months later, and I stayed up until well after midnight putting her together and oohing and aahing over her. It’s a good thing it was a Friday evening, because there was no way I was going to work the next day! I played happily for the next several weeks, trying out and breaking in my new ‘toy’. She hasn’t replaced Rosie, but I do sometimes choose a special project just for her. And since she looks like an ‘old-time’ spinning wheel she’s great for public demonstrations!
The best spinner may not have the most expensive wheel, but she will have a wheel that suits the yarns she likes to spin and her own body. Spinning isn’t fun if it makes you hurt, and the wrong wheel will do exactly that. For example, I’ll never own a Schacht wheel. I love the look of it, the design is wonderful, I own a Schacht loom and other Schacht weaving equipment that I love. But after ten minutes on a Schacht wheel my back is screaming. I finally decided that the wheel just doesn’t fit my body.
I’ve gotten sidetracked again! Before we leave this subject, let me add something else. I belong to two spinning groups, one of which has a very large membership. Members own and use everything from CD drop spindles to Golding wheels. One of the best spinners in the group does everything on a Babe professional. And I’ve spun on it – it’s a good castle wheel, with a good range of ratios and large bobbins. She loves it because it travels easily – she’s spending her retirement traveling to all the places she always wanted to see. Tools are important, but the best spinner doesn’t necessarily have the most expensive wheel. More important than the money spent is getting the wheel best suited to your spinning and your body. An expensive wheel is no good if you hurt after ten minutes of spinning on it.
What about quantity of spinning? Is the best spinner the one who spins the most yardage? I can hear you thinking “Of course not!” And you’re right. Pounds and pounds of skeins of lumpy-bumpy yarn are great if that’s what you want to spin. But if that’s all you’re capable of spinning, well, that’s a bit different.
I love exploring new fibers. Give me a brand-new fiber and some time to play and I’m in heaven. But all my explorations weren’t helping me learn how to spin a consistent yarn. I had trouble with that. A spinner friend suggested a remedy. It definitely helped get me over that hump, and in the process I also acquired some discipline. Her suggestion? That I spin enough of only one fiber for a sweater for myself. It made sense, so I started shopping for the requirement and made my choice. That was 32 ounces of medium wool sport-weight singles. I should only need 24 ounces for a sweater, but best to have extra. I bought two pounds of commercially prepared top so that the fiber supply would be consistent, and started spinning. 24 ounces (6 bobbins) and three months later I put back the first bobbin for a felted hat and spun another 4 ounces so the yarn would match. Then I knitted the sweater and wear it proudly.
Practice is necessary for improving any skill, and this episode taught me that it should be directed practice – you should consciously start out to learn something from your spinning. If you’re using a new fiber, buy an ounce or two extra and play a bit. YOU might want to spin a certain fiber very fine and even as a two-ply, but it may have other ideas and want to be thick and thin singles. Learning not to fight the fiber is part of what makes a good spinner.
On the other hand, the most technically perfect spinner in the world with a wheel perfectly suited to her won’t be able to make more than barely adequate yarn with poor fiber. In my opinion, being able to recognize and choose top-quality fiber is one of the hallmarks of the best spinners.
How do you learn what constitutes top-quality? Some learn by raising their own fiber animals, some by listening to and learning from shepherds and exploring fleeces at fiber events. Some short-cut by purchasing only top-quality prepared fiber from reputable vendors; some buy prepared fiber to supplement what they raise or buy from local sources. All good spinners spin samples from a lock before buying a fleece – your fingers are the best judge of fiber quality, and they must be trained. Once trained, they’re your best tool for the job.
Equally important to good spinning is excellent fiber preparation. You can’t spin an even singles from fiber ‘prepared’ by washing roughly (thus half-felting it), then tearing it apart with a drum-carder or hand cards. Poor cleaning and preparation can ruin any fleece. On the other hand, truly excellent fiber preparation makes spinning easy and the newest spinner look good. The best spinners know that, and spend the effort it takes to prepare fiber perfectly! Properly prepared fiber almost spins itself.
Another hallmark of the best spinners is being able to suit the fiber to the project. The best spinners would never choose an adult Lincoln fleece with a 48 Bradford count for a baby layette. They’d go for merino, Rambouillet, Cormo or Targhee with a Bradford count in the 70’s. Socks would be made from Romney or other 54-56’s wool with perhaps a bit of mohair for strength; a gossamer shawl would be made from silk, Shetland or long-staple Sea Island cotton. Can a good spinner make exceptions to these basic guidelines? Of course. But she will let her fingers be her guide, and back them up with quite a bit of sampling before a final decision is made.
Sampling isn’t a four-letter word, so don’t shy away and treat it shabbily! Sampling is mindful exploration – play if you prefer - and the best spinners do quite a bit of it. It doesn’t require a great deal of time or fiber, and yields an incredible amount of information for that minimal investment. So rev up your adventuresome side and play for awhile!
Want to spin alpaca socks for yourself? Think about it, play with an ounce or so and use it to make a pair of baby socks. You’ll eventually need them for a gift even if you can’t use them immediately. Borrow a baby or especially petite child to try them on. Now observe. Do they appear to be comfortable? Too warm? Too slippery? Too prickly? Watch, don’t assume. Now take them off your borrowed child and hand him/her back to mother. Do the socks spring back into shape, either immediately or after washing? Yes, I know what conventional wisdom says. But what does your sample say? Is there a way to spin or knit that will compensate for any observed problems? Is doing that more trouble than the project is worth to you?
To sum up: when you can answer these questions and make these determinations you’re well on your way to becoming one of the best spinners:
1. Do you know how to choose really top-quality fiber?
2. Do you know how to prepare that fiber properly to obtain the yarn you want to spin?
3. Is your chosen spinning tool (spindle or wheel) well-chosen to fit what you want to spin and your own personal ergonomic profile?
4. Is your fiber choice suited to the project you’re making, and do you know how and why to make any necessary modifications to your spinning technique for that project?
Do you need to work on one or more of these criteria? (If you call spinning work – I call it fun.) How can you best learn what you need to know? Do you need a class, or more practice time, or more information about breeds of fiber animals? Should you attend a fiber festival where there will be lots of vendors in order to try out new tools? You’re the only one who can answer these questions. So get to it! Shearing season is coming up and there will be lots of new fleeces to evaluate and spin!
Wednesday, November 09, 2005
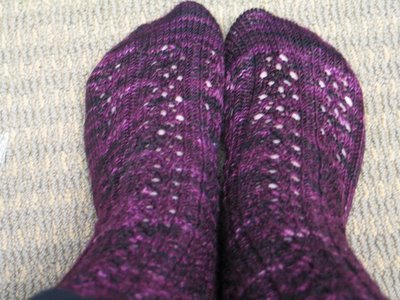
Lacy Koigu Socks
These socks were made on a whim. I ran across the yarn and fell in love with the colorway (I have a weakness for purple). So I stretched the budget to accommodate the purchase during September.
Then the weather began to turn cold. Suddenly I didn’t have nearly enough warm socks. Wear and a general lack of knitting time have brought my own personal sock collection down to an unacceptable 3 pairs. I decided I could take a break from the Christmas knitting to make a pair of socks; after all, I needed them!
I looked over the yarn as I wound it into center-pull balls with swift and ball-winder. Lovely stuff. Short color repeats, all in rich shades of purple, with occasional specks of white where the skeins were tied just a bit too tightly during the dyeing process. Lovely soft yarn, but firmly spun to make stitch definition excellent.
Time to try sampling for a fabric. Size 3 needles gave a nice vest fabric, but too flimsy for socks. Size 1’s were just right, yielding a fabric of 7 stitches per inch – firm but soft, especially after washing. A certain amount of bleeding was obvious when the sample was washed, but that isn’t unusual with deep color saturation. I don’t plan to mix any other yarn with this, and the socks will be hand-washed, so a little bleeding won’t matter.
The stitch choice process was next. A braided or cable rib might work – or the intricacies might just get lost in the colors. I sampled a braided rib and ripped it back out. It just looked lumpy. What about a lace rib? Sampled and frogged. I liked the holes, but not the ribbing. OK, a compromise is in order. Put ribbing at the top to hold up the socks, then after a couple of inches switch over to a lace design interspersed with purl stitches to create some grab. Dig through all my books to find a lace pattern of somewhere between 3 and 10 stitches that I like. Nothing. Maybe I missed something…leaf through the books again. Nope – nothing appealing.
All right, how hard can this be? It’s just holes, and I should be able to put them wherever I want, right? Right! OK, where’s the graph paper. A triangular pattern of holes with knit 2 togethers to maintain the stitch count. A plain row between each pattern row for simplicity in knitting. I don’t want the funky-looking yarn overs you get when you put them right next to a purl stitch. I do want “wings” coming up my leg from the ankle. Play with the pencil a bit…here, this should work!
Here is my very own “Triangle Sock Lace” pattern, shown as knitted in the round. Almost certainly an unvention, but I made it up myself, so I get to name it. You’re welcome to use it. Modification into an all-over pattern would be easy, either as an insertion or offset as a lace fabric, either with or without the purl stitches. With the purl stitches it’s a 9-stitch repeat; without them, it’s a 7-stitch repeat. To offset, you would probably make it a 12-stitch repeat, leaving out the purl stitches and the additional knit stitch between repeats.
+ + + + + + + - - Row6
+ o \ + \ o + - - Row 5
+ + + + + + + - - Row 4
+ + o v o + + - - Row 3
+ + + + + + + - - Row 2
+ + \ o + + + - - Row 1
Key:
+ is a knit stitch; - = purl; o = yarn over; \ = knit 2 together; v = slip 1, knit 2 together, psso (double decrease).
Blogger doesn't like tables, so the spacing in the stitch chart is a bit strange - but if you check closely you'll see that there are 9 stitches in each row. Of course, when knitting flat you would purl the even-numbered rows, knitting the back side of the purl stitches. But doesn’t it look nice in the round? The pattern yarn-overs make nicely-defined holes at the 7 stitches per inch stockinette gauge of the Koigu yarn, and don’t get lost in the color changes. The purl stitches help the socks hug the leg and foot nicely, and I continued the pattern down the top of the foot, as you can see.
By the way, for you new knitters out there: the lace pattern changes the gauge. Over stockinette with size 1 needles the gauge is, as stated above, 7 stitches per inch. A 9-stitch repeat over the pattern, however, measures 1.5 inches, or 6 stitches per inch. So instead of casting on 56 or 60 stitches, I cast on 52, increasing to 54 stitches on the first round after the ribbing. The socks fit perfectly. Did I do another sample to test this? Of course I did! But I frogged it back out in order to have the extra yarn, so I can’t show it to you.
I’ll watch these socks carefully, though. At a gauge of 6 stitches per inch over the pattern they may not wear as well as I would like. But they’re pretty, warm, and only took a week away from my Christmas knitting.
Tuesday, October 25, 2005
The pictures of the cashmere gloves are above. These were made from 2 balls of Richesse et Soie in the lovely, soft gray they call Fog. Since my winter coats are a black leather, a pink microfiber with gray lining, or a red wool, they’ll go with all of them. I made them just a bit large, knowing that they will shrink with wear and washing.
Gauge on these is 10 stitches per inch, and I made them on size 0 Brittany birch needles. I followed the basic outline in an earlier entry for making them (http://fiberlife.blogspot.com/2005/08/method-for-basic-mans-glove-size-extra.html) and it went much faster than you would think something at this gauge would go. I had only about 10 yards left in each ball when the glove was finished. Perhaps these are a bit extravagant, but they’re wonderfully soft and make me feel positively elegant!
Tuesday, October 18, 2005
Spinning for Socks – Again!
I’ve talked about this before, but every so often the questions come up again on one or another spinning list. So one more time, let’s talk about spinning for socks. Remember, you’ll go through similar steps when spinning for any specific project! But that's another day's posting.
Your mother probably told you that everybody is different, and she was right. Every sheep is different, too. While there are general breed characteristics that mean you probably wouldn’t want to spin Lincoln or Churro for a baby layette, there are also exceptions to the standard. Shepherds can, to a marked degree, breed for softness, fineness, crimp or luster in their flocks. And cross-bred sheep can show the best of several ‘parent’ breeds. My favorite sock yarns come from a Shetland-Romney cross ewe who belongs to a friend. Since she’s getting up there in years, I’m glad two of her daughters’ fleeces show the same characteristics.
Generally, you’ll choose a fleece for socks that is medium-soft, medium-long, and medium-crimpy. A Bradford count between 50 and 58 is ideal for a sock fleece. This means a Romney, Shetland, Border Leistershire or Finn, if you go strictly by the breed characteristic. But I’ve spun Lincoln lamb with a count of 52, and it made wonderful, heavy sock yarn. Down breeds like Suffolk and Dorset are springy and almost impossible to felt. Some individual down fleeces are too coarse for anything but rugs, but some are perfect for socks! So don’t rule out ‘coarser’ or ‘meat’ fleeces until you check them personally. They may be exactly what you’re looking for!
Life has a way of wreaking havoc with generalities, coming up and biting you at the worst times. What if all you have on hand is 6 ounces of hand-painted 64’s merino roving and you need a pair of socks for a gift in just a couple of weeks? You have time to spin prepared fiber, but not enough time to purchase a fleece, wait for it to arrive, clean it, dye it, comb it (the best socks are always from worsted prep) AND spin it, then knit the socks! Besides, the painted roving is in perfect colors for the gift recipient, and you don’t have the right colors of dye on-hand, even if you had a proper fleece in the stash.
So spin the merino already! Spin it fine, worsted and with quite a bit of twist – use one of the smaller whorls on your wheel or a lighter drop-spindle. Aim for a singles of about 45 wpi. Once you have at least 110 grams of singles, start plying. (Yes, I know you can make a pair of socks from 100 grams – but what do you do about giving darning yarn with the socks? Making your gauge swatch? Spin the extra 10 grams – it will take you less than a half-hour.) If you spun that wonderful painted roving with fairly good color definition, consider Navaho-plying to keep those colors bright. Ply carefully, from a tensioned bobbin, and go slooowly. Keep the twist consistent, and put in a bit more than you need for a balanced yarn. As long as your twist is sufficient, nobody will ever feel the ‘bumps’. On the other hand if the roving gave you lovely heathery singles, consider cabling for a 4-ply yarn. It will make for a slightly larger-grist yarn that you can knit on larger needles – a consideration if you’re afraid of size 0 or 1 double point needles. (Although you really should get over that.)
Wash or steam the plied yarn to set the twist. You may want to dry the yarn slightly weighted, just to control the extra twist. Yes, I said extra twist. You don’t want a yarn that’s kinky-curly, but you do want a couple of twists along the length of the hank. It will help those fine fibers wear better.
After the yarn’s dry, make balls and start swatching. This will take up at least some of that extra 10 grams of yarn. Start out with needles no larger than the yarn diameter. Say what? Yes, I said to start with needles no larger than the diameter of the yarn itself. But that may not work – you may need to go down a needle size or even two. You want a very firm fabric. At least 8 stitches per inch, if you’ve made sport-weight yarn – 9 to 12 stitches per inch for sock-weight yarn. No, the finished socks won’t stand alone. They will be quite tightly knitted, but that’s what you need. Even straight 64’s merino (no nylon, mohair or other reinforcement) that’s spun tightly, plied tightly, and knitted very firmly will give you fairly decent wear. How can this be? Let’s take another look.
You’ve partially countered the fine, soft wool’s tendency toward felting by putting in extra twist, thus making the fibers compress more than you would want for a sweater yarn. The ends will have more trouble escaping from that extra twist, and should pill less. You’ve spun finely, and firmly plied at least three singles together, and possibly four. Those multiple plies from thin singles should also help with abrasion and pilling. Then you’ve knitted that firmly twisted yarn at a very firm gauge, leaving it very little room to move around and felt. While you won’t get five years of once a week wear from these socks, you will get at least two years, three if you’re careful about washing.
There! You’ve successfully made a decent pair of socks from fine wool. Don’t let anyone tell you it can’t be done. But now that you’ve finished with the current emergency, let’s talk about the best handspun for socks.
Say you want to back up and make those 5-year socks…you’ll want to re-read my notes about appropriate medium wools. Choose one of them, either as a fleece or as prepared top. Again, worsted prep is best, since it gives you the best resistance to abrasion. Spin as close to a worsted single as your temperament will allow.
What grist? It depends on the fleece. Socks will wear best if made from a tightly-spun yarn. But sometimes a single push of the treadle can make the difference between a firm yarn and a harsh one. I know you get tired of hearing ‘sample’ but you really do have to get over it. Look at sampling as shopping – you wouldn’t buy a soft-spun singles alpaca-wool blend for socks, so don’t spin one. Or look at sampling as exploration. You’re charting the potentialities of this particular fleece or roving or top.
There are a couple of things to keep in mind, though, as you spin those singles. First, you need at least two plies, preferably three in the finished yarn. If you want to make socks from singles, look back at this blog entry for my thoughts on the subject: http://fiberlife.blogspot.com/2005/06/todays-rant-and-sock-tutorial.html. Have you read it? Great – now it’s up to you. If you want to spin for hard-wearing socks, continue to read here.
My favorite sock yarns are cabled. Yes, I know I have to spin more singles yardage in order to cable the finished yarns. And I’m aware that I have to spin finer in order to end up with a sock-weight cabled yarn. But my knitting time is limited by the other things in my life. It’s much better in the long run to make socks that will last awhile, thus leaving more knitting time for things like sweaters and lace shawls and gloves and hats. My usual sock fleece or top is around 54-56 count. I haven’t found nylon to be particularly necessary in medium wools, although I have been known to blend it into the finer 58-62’s fibers. I usually spin this medium wool worsted-fashion at about 36 wpi as singles. This is not the time, however, for the small whorl on the wheel. I’ve learned that the best ratio for spinning this fiber firmly, without going over the line to harsh, is about 9.5:1. Yes, I sampled several fleeces and prepared tops to determine this.
I spin the singles counterclockwise (Z), and ply the first time clockwise (S). Then I ply the resulting two-ply yarn again, counterclockwise. I end up with a nice sock-weight yarn of about 18 wpi.
When it’s time to knit, I again choose needles that are about the same diameter as the yarn. That means 1’s, maybe 2’s. That gives me a gauge of somewhere between 7 and 10 stitches per inch. You want a firm fabric for the same reasons that you did in the finer wools – it will wear longer, with less pilling and felting. It will also feel better on the bottom of your feet - no uncomfortable rubbing after a couple of hours. You have to remember that you’re working with handspun – do a large (24-30 stitches) circular gauge swatch and measure over at least 2 inches in at least 2 different places on the swatch. As spinners, our yarn is subject to some variation.
If you prefer to make toe-up socks, a gauge swatch is still a valuable reference, as it can keep you from having to frog and re-work the toe cast-on several times. You can start out with the needles that give you the fabric you want. Remember, you still need a firm fabric.
The other variable is fit. You can check the previous reference on my blog for fit hints. But socks that slide around on your foot will require much more extensive and frequent darning than those that fit properly, regardless of the fiber you’ve chosen. Socks, in case you haven’t already figured this out, require negative ease. For those who haven’t clicked back yet, I’ll explain briefly. When you’re making a sweater, you want to add anywhere from 5 to 15 percent of your skin-level circumference in order to arrive at your finished dimensions. That’s because sweater fabric is thick, taking up some room (up to two inches total in bulky yarns), and sweaters insulate and look better if they aren’t skin-tight. Socks, on the other hand, need to be skin-tight in order to provide the cushioning your foot requires without taking up too much room in your shoe. So you want your sock fabric to be slightly stretched during wear.
If you follow the above instructions you will make well-fitting, long-wearing socks from your handspun - or from commercial sock yarn.
What about making socks from luxury fibers? I really haven’t tried much of that. I did put angora cuffs on a pair of socks – the angora felted long before the wool, and I had to cut it off and re-knit the cuffs from wool. I made one pair of socks (at my father-in-law’s request) from a 50-50 wool-kid mohair blend. He loves them, and is still wearing them six years later. But I thought then and still think that the fabric is just too scratchy! My next experiment (when I get around to it) will probably include some alpaca, simply because I’m on an alpaca ‘kick’ lately. But right now I’m happy sticking to wool.
Tuesday, October 11, 2005
Beginner Pattern Pictures
Here are photos of the 2 beginner patterns I’m using for my class. The garter-stitch dishcloth is such an easy way to practice basics, and if done in cotton can be frogged as often as necessary. As for the stockings, I did fraternal ones (who says socks have to match?!), and will probably use the remainder of the yarn to make at least one more pair of short socks while teaching the course. Or maybe not – I do have some lovely sock yarn that I could use to make a second pair during the course!
Wednesday, October 05, 2005
Detour!
I’ve been working madly this last couple of weeks, both at work and on another project. I work in a rather large building (well, large for East Tennessee – about 800 people work here). There are a few women, although we’re in a definite minority. After talking to several, I got permission to hold knitting and crochet classes after hours during the winter in a large, windowed conference room. So I’ve been working up some instructions, patterns, and other basics.
I decided to do a Fiber 101 unit first, followed by the knitting unit and then crochet. A fiber overview is often necessary because so many people don’t really pay attention. It isn’t as though everyone is taught basics at home anymore – or even in home-ec courses. I’m not even sure our local high-school HAS a home-ec course… Anyway, I decided to begin with the basics. That class was yesterday, and I think it went all right.
As for the knitting class next week, the plan is to get started with a corner-to-corner garter-stitch cotton dishcloth. Why not? It’s an easy way to teach cast-on, knit stitch, yo increases, k2tog decreases and bind-off. Next will be a stocking or pair of socks – student’s choice. That will cover working in the round on double point needles, purling and ribbing, heel stitch, short rows, matched decreases and kitchener stitching. This should take us through Christmas, and we’ll take a break until January, when we’ll start crochet.
Between writing the instructional materials and making up the samples, I’ve been wildly, happily busy! I really do enjoy teaching – I should probably try to come up with a way to do more of it. But the samples should be finished by this time next week, and I’ll get back to Christmas gifts. Three pairs of gloves are already finished, and I have about that many more to go. And there’s the everlasting edging on the silk shawl – I’m still plugging away, but it may take me another year to finish it.
Saturday, September 10, 2005
Knitting Police, Beware!
Several months back I read a comment on a knitting list to the effect that knitting backward is only used by “regular” knitters for edgings. I jotted the comment down in my calendar, but neglected to add any information regarding who made the original comment and on what list. What can I say – life is sometimes a bit hectic!
I backtrack through my calendar fairly often, since it’s my diary for not only work, but also my ‘other life’ of fiber and family. This phrase has jumped out at me several times, and each time I’ve gotten miffed all over again.
Perhaps I'm just slightly affected, but, especially in flat stockinette, I always do the purl rows by knitting backwards - from the right to the left needle. My tension is more even that way. I knit Continental fashion, so you wouldn't think rowing out would be a problem - but sometimes it is. When I see the purl rows extending in the swatch, I make a mental and physical note and do those rows by knitting backwards while making the knitted object, whether it be sweater, shawl, or edging. I learned the skill for lace edgings and entrelac, and have maintained it through use.
I have to agree with whoever it was who said there was no wrong way to knit (EZ? P. Gibson-Roberts?). There are ways that work for each knitter, and ways that don't. I know how to purl perfectly well - I do it all the time in socks and texture patterns and ribbings. But there are times when I choose to knit backwards (right needle to left) because it gives me the smooth, even look I want in that (usually stockinette-based) pattern.
For what it's worth, I've also found that on some lace patterns that are stockinette-based, knitting backwards across the purl rows gives a more even appearance. However, it does require more concentration, at least until you get used to the pattern. It’s all too easy to miss a yarn over when knitting backwards! And you don’t want to know how I figured that one out…
One of the knitters in my Saturday group said it must be easier for lefties to knit backwards. But in my opinion knitting backwards has nothing to do with left- versus right-handedness. I've been teaching crochet, tatting and other needlework for decades now, and can work crochet and tatting perfectly well left-handed, once I do a few stitches and get back into the swing of it.
After all, knitting in any fashion uses both hands. Knitting requires two needles, and whichever hand carries the yarn, both hands are necessary to manipulate those two needles. I’ve heard educators and physical therapists make a good case for teaching knitting and other basic needle arts to all children from an early age to develop eye-hand coordination and fine motor skills. I can testify that it worked for my own three children. Any number of my coworkers who were educated in Europe and Asia find our educational systems’ lack of this type of instruction puzzling. They point to the relationship between needle arts and math and science basics like logic and sequential visualization - basic reasoning skills. But I refuse to take on the educational institution of this country - like all institutions, it has strengths and weaknesses and a myopic view.
I must say that handedness has never been a problem with teaching knitting, which I’ve done formally for the past 8 years, and informally for decades before that. I simply ask the student to try Continental first, and if that doesn't work for them, I have them try English-fashion. I've had only a handful of students who preferred English, and they were all "relearning" knitters who had started out that way to begin with, even though that may have been decades ago. Frankly, it doesn’t matter at all to me which way they knit! I had one student a year or so back who could only learn PGR’s combined knitting. She does beautiful work. As soon as the work is off the needles, nobody can tell exactly how it’s been knitted without extensive analysis, anyway!
Most knitters eventually learn at least two methods of knitting. Right-handed Continental knitters learn to do color-work by carrying one strand in each hand, using the yarn in the left hand in the usual fashion and that in the right as an English knitter does. Right-handed English knitters learn to do color-work by knitting in the usual fashion with the yarn in their right hand, and Continental fashion with the yarn in their left hand. Of course you can knit color-work in only one fashion, twisting and picking-up/dropping threads as necessary, but it isn’t nearly as fast or evenly tensioned as using both hands. So most knitters, sooner or later, learn to do a two-handed carry.
All this is by way of saying that knitting is supposed to be a pleasurable activity. If you’re getting the fabric you want and enjoying the process of making it, how you form the stitches is nobody’s business but your own! I give the busybodies around me (yes, there are always a few) who insist that I knit wrong because I knit Continental fashion or knit backwards on purl rows short shrift. I tend to delete those sorts of comments immediately on posts, too. This is my prerogative, assumed due to my advancing age and vast experience of buttinskies.
If you are a member of the knitting police and want to come arrest me for my views or knitting methods, you can find me happily ensconced in my favorite knitting chair next to my spinning wheel, surrounded by fiber and yarn and knitting away in my own fashion. I reserve the right to take my fiber tools and fiber along with me into durance vile, and assume total responsibility for the converts I make to my own admittedly liberal views while incarcerated.
Monday, August 29, 2005
Method for a Basic Man’s Glove, size extra-large, with notes for other sizes
My DH is a large man. He’s big-boned and broad-shouldered – nice to snuggle up to on a cold winter’s night. But knitting for him sometimes makes me feel as though I’d started on an endless project – it takes so MANY knit stitches to fit him! So I tend to do small things for him – mittens, hats, scarves and such. Lately he’s been hinting for a pair of gloves. I found some lovely KnitPicks Andean Silk in chocolate brown worsted weight (96 yards per 50 grams) and fell in love with the look of the yarn. So I ordered enough for a pair of gloves, and decided that they would make a lovely addition to his Christmas. You can see a picture of the first one below (and in the August 24 entry), and I finished up the second one this weekend.
Knitting with this yarn was a real pleasure – it flows through the fingers like silk, but with all the softness of fine alpaca and wool. The finished fabric is beautiful, with good stitch definition and just enough bloom to make the gloves lovely and warm.
But back to the beginning of this project! It had been about a year since I did my last pair of gloves, so I started looking for a pattern on the web, and found nothing for an extra-large men’s glove for worsted-weight yarn. So I pulled out my old magazines and found the glove issue (Winter 2003) of Knitters from Interweave Press. Yes! Exactly what I wanted – guidelines for making gloves that would fit him exactly!
You know, as a beginning knitter, socks didn’t scare me. I completed my first three pairs before I realized that turning a heel was supposed to be difficult. Gloves frightened me, though. How on earth could you pick up all those stitches for fingers and knit them to just the right length? What if you picked up too many or too few stitches – could you take them back out? It just looked too complicated!
Well, time went on. I knitted hats, mittens, baby sweaters, and i-cord. Small tubes didn’t make me nervous anymore. Then I saw that issue of Knitters and a light-bulb went off in my head. I could do this! And I did, making gloves for myself during Winter 2003 and more pairs for Christmas 2004 gifts. I’ve even gotten bold, making color-patterned gloves and learning all about how gauges shift when yarn is carried. But for some reason these simple gloves for my DH made me nervous. Perhaps because I really wanted them to fit him perfectly – after all, he’s my chief fiber enabler. So I’ll offer these guidelines for others who want to make gloves that fit exactly!
1. Swatch! And wash your swatch! Measure it both before and after washing! I know this is elementary, but it’s an absolute if any wearable is going to fit properly. This particular yarn was designed to be used for sweaters and hats and such. The recommended gauge on the yarn sleeve is 4.5 – 5 stitches per inch on size 7 or 8 US needles. Unfortunately, this doesn’t suit at all for gloves. The fabric is too loose, and allows too much wind and cold through. If you felt the gloves enough to keep the wind out, they’re too stiff for comfort. So you have to swatch in order to find a fabric that will keep the cold out, but still move easily with the myriad hand movements we make, even outdoors in winter cold. I started out with size 5 needles, but that fabric (at 5.25 stitches per inch) was still too loose. I moved down to size 4 needles, and that was better (5.5 stitches per inch), but still not quite what I wanted. So I finally went to size 3 (3.25mm) Brittany wooden double-point needles. That was exactly what I needed – a fabric of 6 stitches and 8 rows per inch which was nice and dense, but still with plenty of give. And knit at this gauge there was a slight bloom upon washing, but no real shrinkage or felting.
I always work on 5 double-point needles. I find that a less acute angle between needles, and thus stitches, makes for less laddering problems. But if you prefer 4 double point needles, or even one or two circular needles, go for it. A word to those who like doing small circumferences on a large circular, though – I’ve never been able to get it to work well on the fingers. The circumferences are just too small.
2. Take accurate measurements! A surprise isn’t really a pleasure for either the recipient or the maker if it has to be re-done before it can be worn. If you can manage to take your measurements surreptitiously, great. But if the only way to get good measurements is to sit down with the intended wearer and a tape measure, by all means do it. My DH got a great deal of pleasure from watching me work on his gloves, bragging to everyone that these were for him, made exactly to measure!
The easiest thing to do if you won't have ready access to the person for whom you're knitting is to simply trace around their hand on a piece of paper. Measure the hand width and double that number (front and back of hand) at each of the points listed in the paragraph below. Add an inch's worth of stitches at your gauge (6 stitches per inch in this case) to allow for the thickness of the hand. And you have it. You might want to check to be sure their hand isn't unusually thick - if so you can add a few extra stitches to make up for it. (Thanks to Fran for this editorial note.)
The minimum measurements for gloves are: wrist circumference, knuckles circumference, gusset circumference (around hand at base of thumb, at the widest point of a fist), hand length from base of wrist to tip of longest finger, and ribbing length desired. Write these down – believe me, you won’t remember a week later and these sizes need to be exact!
3. Ask or look to see how the wearer wants the gloves to fit. Gloves are like socks – some people like a little room, others like them to fit tightly. I make gloves for myself with a slightly negative ease, but my DH prefers a bit of room.
4. Do the math! Your gauge swatch will give you not only stitches but rows per inch. You’ll need that later, so write it down. Your written instructions don’t need to be elaborate, but they do need to be legible – you have that second glove to make, after all! Figure out exactly how many stitches you need to cast on for the wrist and then decide on the ribbing you’ll use. I was lucky – DH’s wrist circumference was just a hair over 8.5 inches, giving a cast on (at 6 stitches per inch) of 51 stitches. So I cast on 52 stitches for a couple of reasons. First, I wanted a long ribbing of 3 inches so that the gloves would slide well under his coat sleeve band, and his wrist expands into a larger arm measurement within those 3 inches. Second, he likes his gloves to fit loosely. A 52-stitch cast-on would take care of both of those, and also be divisible by 4, which would allow my preferred K2P2 ribbing.
5. Check the difference between the knuckle and wrist circumference. Some people have less than an inch difference between these measurements, but some people have considerably more. If the difference is less than an inch, I don’t bother with increases. But if it’s an inch or more, I plan increases in the first row after the ribbing. My DH’s is exactly an inch, so I planned for 5 increases in the first row after the ribbing. This makes the glove hand exactly the diameter of his hand (9.5 inches at 6 stitches per inch equals 57). By the time allowance is made for the width of the fabric itself, this gives a fit exactly the way he likes it – slightly loose. I would subtract ¼ - ½ inch from the actual measurement to get the tight fit I prefer for myself, and with only ¾ inch difference between the two measurements normally don’t do any increases unless I’ve chosen a rather inelastic fiber like cotton.
6. Start your gusset increases about an inch from the point where the ribbing ended (on the 9th row for my DH’s gloves). This is the first place your row gauge will come in handy. I like an asymmetric thumb gusset, so that’s what I’ll use in these instructions. If you prefer another gusset style, by all means use it. I divide my stitches into fourths fairly automatically, making adjustments as needed so that the center of the round falls between the end of the second and beginning of the third needle. This makes starting a gusset easy – for the left hand the drill is knit to 2 stitches from the end of the second needle, place a marker, increase 1 stitch, knit 4, place another marker, and continue. On the next round, knit even. Continue, alternating an increase round with a plain one, until you have enough gusset stitches.
What’s enough? How much difference is there between your knuckle measurement and your gusset circumference measurement? In the case of my DH, there’s 1.75 inches. So I increased every other round until I had 12 stitches between the markers. 12 stitches is 2 inches at your 6 stitch per inch gauge. 12 minus the 8 stitches you increased is 4 stitches, or 3/4 inch. Yes, this will make the gusset have a slight negative ease – ¼ inch – but you’ll make up for that when you pick up the palm stitches to knit your thumb. I’ll grant that I just did this and hoped it would work out, since the gusset, at 12 stitches, was exactly the right length (judged by trying it on my DH). But then I looked back at various patterns and found that it was fairly common to have a slight negative ease at this point.
On the next round I transferred the gusset stitches to a double strand of worsted-weight yarn, threading it though a yarn needle and slipping the stitches purl wise onto the yarn. I then did a backward-e cast on of the original 4 stitches (those between the markers, remember?), taking me back to my original 57 hand stitches. On the next round I put two of those cast-on stitches on the 3rd needle, and left two on the second needle. Do cast these stitches on snugly, but don’t obsess too much about slightly loose stitches here – you can tighten them up when you knit the thumb.
7. Now it’s time to look at your row gauge again. How much room do you need from the end of the gusset, which should fall at the bend of the thumb, to the point where you’ll start the fingers? It’s different for everyone, but the average is between 1 and 2 inches. If the recipient is handy, they can try it on; but if not, you’ll have to make a choice. My own smaller hand only needs an inch plus one row; my DH needed almost 2 inches (18 rows). Knit those rounds even, and stop on the final round at the end of the second needle – just above the mid-point of the thumb gusset, with two of the stitches you cast back on at the front of the hand, and the other two at the back.
You’re about to figure your fingers, so put down the knitting and grab a pencil and the calculator. Do all your figuring first – then knit! And don’t worry if the amounts of stitches seem a little scanty – you’re going to be adding stitches between the fingers.
Your first finger will be done on 1/3 of the total number of stitches. In the gloves I made for my DH, 57 divided by 3 is 19. The middle finger will be done on ¼ of the total number of stitches – in this case that will be 15 stitches. The ring finger and little finger will divide the remaining stitches. 57 minus 19 minus 15 equals 23. That won’t divide evenly in half, so I used 12 stitches for the ring finger and 11 for the little finger.
Next decision: How much room do you need between fingers? The usual rule of thumb is ¼ to ½ inch’s worth of stitches, but not more than 4. On gloves for myself at a gauge of 6 stitches per inch, I’d cast on 2 stitches for the fourchette (between fingers) stitches, but my DH is quite a bit larger than I am. I’ll use three stitches for him.
8. Now you’re ready to knit the fingers. First transfer ALL the hand stitches (yes, all of them) to a doubled strand of yarn of a different color than that you’re working with. It makes seeing what you’re doing much easier. Now use one double point to pick up 9 stitches from the palm (orient yourself by the thumb opening) and 10 from the back-of-hand stitches. There’s your 19 stitches. Your thread will already be at the midpoint if you divided your stitches as I suggested above. Knit around to the space between the first and middle fingers; add 3 fourchette stitches using the backward-e cast-on technique onto a third needle. Continue knitting around. After another row or two, redistribute your stitches on the needles so that you have some support for that fourchette. I tend to work these small tubes on either four or five double-point needles, whichever is more comfortable at that time. Keep knitting the tube around and around until the length is even with the end of the finger. Next row, knit 2 stitches together around, reducing the number of stitches by half, and then do another knit 2 together round. You’ll end up with no more than 5-6 stitches. Cut a long yarn tail, run it through the stitches twice, then draw together tightly. Take the end to the wrong side and weave it in.
9. For the middle finger, you’ll use 8 stitches from the palm side and 7 from the back-of-hand side, just to keep things even. Pick these up on two double point needles. Take a third needle and pick up the 3 fourchette stitches from the first finger. If necessary, pick up an extra stitch at each corner and decrease it away by knitting two together on the next round – that will help eliminate any holes. Attach your thread at the ring-finger end of the back-of-palm stitches and knit that needle, then the fourchette pick-ups and the palm stitches. Now do a backward-e cast-on of three more fourchette stitches to take care of the space between the middle and ring fingers. Knit a round, decreasing any extra stitches, then redistribute the stitches more comfortably. Again, continue knitting until just at the end of the finger, and fasten off in the same manner as for the first finger.
You’ll have an extra end where you started this finger. Use that to help eliminate any holes, too. Instead of just weaving it in for a half-inch and cutting it off, take it around in duplicate stitch and use it to double the thickness of the yarns around those holes. That should take care of any holes easily.
10. Do the ring finger much the same as the middle one; pick up 6 stitches each from the palm and back-of-hand, the 3 fourchette stitches between this and the middle finger, and add 2 or 3 stitches between the ring and little fingers. By this time it’s probably quite comfortable, and you’re anticipating what you should do. Again, pick up an extra stitch in the corners if needed, and decrease them away on the first round. Knit round and round to the desired length, and do the decreases and finishing as for the first and middle fingers.
11. You’re down to the little finger. Pick up the remaining 11 stitches on two needles, pick up the fourchette stitches from the ring finger, and knit around to the end of the finger. Decrease as for the other fingers, and weave in all ends.
12. Now for the final effort. Go back to the thumb. Of course you can do this at any point after the gusset stitches are completed, but I usually do it last of all. To many knitters, the thumb can be tricky. You’ll first slide the live stitches on your yarn (12 of them, remember?) back onto two or three double point needles. Now pick up at least the 4 stitches you cast onto the palm on another double point needle. I normally pick up two extra stitches, one at each end, to help eliminate holes and provide a bit of extra ease. So I picked up a total of 18 stitches. Attach your yarn, beginning to knit at the palm side of the stitches. Continue to knit around, just as for the fingers, until you’re at the end of the thumb. Knit 2 together around, then knit 2 together around again. You’ll have 4 or 5 stitches to finish off just as you did the fingers.
13. If you haven’t already, weave in all your ends, including the cast-on back at the ribbing. Make the right glove just as you did the first one, EXCEPT: when you start the thumb gusset, change your point of increase. On that 9th round, knit to 2 stitches from the end of the second needle, place your marker, knit 4 stitches, increase 1 stitch, then place the second marker. Just shift your increases to the other end of the markers! Proceed just as you did for the left glove, doing a plain round between the increase rounds until you have the required number of gusset stitches. That will make left and right handed gloves, with all the increases on the palm side. Continue exactly as for the left glove.
Now wash the gloves, finger-block carefully, and let dry. Then box nicely, and don’t forget to include both fiber content AND washing instructions!
These make beautiful small gifts for Christmas or birthdays, and the amounts of yarn needed are so small that you can afford to use those beautiful cashmere yarns you lust after at your LYS. 100 grams will do anything up to an adult large glove. (However, I used about 120 grams for my DH’s extra-large gloves.) They work up amazingly fast, with a pair of simple gloves taking no more than a week of evening knitting. They’re astounding to the recipient, who doesn’t have a clue how simple they are to make. And like socks they’re easy to ‘dress up’ with fancy stitches or color work bands. How about duplicate-stitching initials into the palm stitches just above the ribbing band? Or even eliminating ribbing entirely and doing color work rounds in place of the ribbing? You can use them as the swatch for a Fair Isle sweater and have a matching pair of gloves for your cardigan!
Like socks, the techniques for gloves are easily memorized, and they’re great carry-along knitting, as well as being great summer knitting. Working on them in public is a sure-fire conversation starter, too, since so many people can’t believe what their eyes are showing them (especially if you’re working on the last couple of fingers). “Are you really making gloves?” is the usual comment, delivered in an amazed tone. My usual reply is a rather smug “Absolutely.” The conversation always continues from that point, and I’ve ‘hooked’ several fiber addicts through knitting gloves in public.
So gather some beautiful wool or wool-blend yarn to match your favorite winter coat and a tape measure. I’ve synthesized and meshed several things together from not only the three articles in that Winter 2003 copy of Knitters, but my own experiences for the steps outlined. Follow the steps above, or pull out your own copy and follow the steps in the articles given. Make your first pair. But beware – gloves are almost as addictive as socks! Don’t say I didn’t warn you!
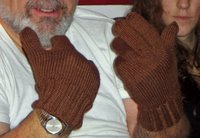
Wednesday, August 24, 2005
What a Great Weekend!
We went to Chicago to see my son’s Pass in Review (graduation from Navy recruit training, for the non-Navy folks out there). We had a great time! We left Tennessee on Wednesday evening, drove up to between Louisville and Indianapolis, and then on Thursday drove on to Chicago.
The Great Lakes Naval Training Facility is to the north of Chicago, in North Chicago. Lovely country, with the lake to the east and the plains stretching out to the west. Friday was the graduation, and I must say that the Navy does ceremony well. It was both moving and impressive. I suppose if you do something every week for decades you eventually do learn what works and what doesn’t!
Got my hands on my seaman as quickly as possible, and left for as much family time as we were permitted. He had liberty on Friday afternoon and early evening, Saturday all day until early evening, and Sunday. We consulted, and he wanted to go to Six Flags and ride roller coasters! This was a bit of a surprise, but we were amenable. Roller coasters are always fun! So we spent several hours of a very hot (over 90 degrees) summer afternoon riding up, down and around at fairly high speeds. Then it was back to the hotel to cool off and have a home-cooked meal and then back to the base to drop off the boy. The hotel bed definitely looked good that night!
Saturday was downtown Chicago. My younger son wanted to see the view from the Skydeck of the Sears Tower and all of us wanted to see the Art Institute. We started from the Lake Forest train station and spent a pleasant hour conversing, sightseeing and knitting enroute to Olgivie Station. Then it was off walking from the station to the Sears Tower and back to the Art Institute. More walking through the Institute, along with a slight disappointment – the textile collection was closed for construction! Only a slight disappointment, though, since the Toulouse Lautrec exhibit was open, and the European collection from the 1400’s through the 1800’s was open. By the time I’d perused both of those I felt like I needed a rest! I told my DH that I really wanted about 2 months of daily visits to the Art Institute and asked him to please arrange it. He laughed, and promised that if we ever came into a lot of money he’d do what he could.
Sunday was the day we had to leave to come home. Younger son had to be back at school on Monday, and older son’s girlfriend (also along for the weekend, and a really nice young lady) ditto. So we picked up our seaman as early as possible and went to breakfast – a late breakfast for us, and a second one for him. After eating we drove east to Lake Michigan and paddled our feet in the very cold water for a few minutes. Then it was back to the base for the last time, with tears and laughter and promises to try to get home for the holidays and to write often.
I’m so proud of all my children; they’re growing up to be good and responsible people. I do realize that this is only the first leave-taking – my son-in-law is already in the Army, and my daughter is headed into officer’s training as soon as she graduates from college in January – but placing a child into the hands of an impersonal military is so difficult. Time to stop this train of thought, or I’ll start crying again!
Knitting is a great ice-breaker on a crowded train! I was working on this glove’s fingers while riding to and from town on Saturday, and had so many people ask me about what I was making.
One lovely knitter in the Lake Forest station with a Russian accent and limited command of English communicated quite well that she loved the yarn (KnitPicks worsted-weight Andean Silk alpaca-silk-wool in a chocolate color) and thought that I was doing a very good job of knitting. Also that my DH was a lucky man to have a wife who would make him such warm gloves for winter! The train was also packed with Navy personnel and their families, and many of the seamen and officers commented on the knitting – one even hinted to his wife that he would like a pair like the ones I was making.
We’re back home now, and getting back into the daily routine. Work is busy, of course; you always pay for time off by having to catch up on everything you missed. It seems harder than usual, but that’s probably due to the cold I picked up somewhere on the trip. In any case I have lovely memories of a weekend of family fun to sustain me until I get to see my seaman again!
Wednesday, August 10, 2005
Safety and Handwork
Yes, a question has set me off again! But in a different vein from my usual rant. There has been quite a bit written about knitting and spinning and crochet and various repetitive stress disorders, and I don’t want to revisit that topic. But very little has been written about basic tool safety. Perhaps we just don’t think of our fiber tools as dangerous objects. The facts, however, say differently; safety should be addressed. Fiber tools are frequently sharp and/or pointed very hard objects.
I spend five days a week in an extremely safety-conscious workplace. So I’ve learned to be quite aware of safety in everything I do. As knitters and spinners we use potentially dangerous tools many times a day; so often that we cease to think of them as dangerous. But any safety engineer will tell you that it isn’t extraordinary circumstances that get people hurt – it’s the little repetitive everyday chores. So let’s take a look at our tools from a safety viewpoint, first spinning, then knitting.
First there are scissors. Remember your mother warning, “Don’t run with scissors in your hand!” There is a reason. Depending on what I’m doing, I may use either blunt- or sharp-pointed scissors with blades ranging from little more than an inch long to comparatively huge 9-inch dressmakers’ shears. The sharp points all have sleeves. Most of those sleeves are made from heavy vinyl or leather that has been cut to shape for each pair of scissors and closely stitched to prevent the points from working their way out. A few have hard plastic sleeves, but these tend to get lost – therefore they don’t do any good. The blunt points are stored with the blades closed. Think about your scissors. If you sit on them, or drop them onto your foot, could it mean a nasty puncture wound? Then secure them in a sleeve or case. The time lost in removing and replacing them is minimal.
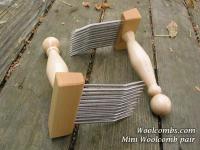
I’m a spinner of primarily worsted yarns. So I have wool combs in two sizes. If you’ve never seen wool combs, you’ll be shocked by a description. Pictures of my particular combs are from
Bountiful
and from Woolcombs.com.
As you can see, these are as dangerous as any set of chef’s knives. Tines range from the 3.5 inches of the mini-combs to the 6-plus inches of the Indigo Hound Viking combs. Each comb has two rows of these lethal steel spikes. I’ve been known to intimidate my daughter’s dates with these tools. How on earth can you use them safely?
First, break down what steps it will take to get the job done. In this case, you want to end up with clean, fluffy, well-aligned top, nested and ready to spin into fabulous worsted yarn. So the first step is to clean the well-skirted wool. Use a good detergent, plenty of really hot water, and several rinses – you don’t want sticky fleece! While the fleece is drying, shake it around a bit to get out as much vegetation as possible – sheep are messy eaters.
Then set up a work station. You’ll want plenty of elbow room on a steady table or workbench and a stool that’s a good height for working. Leave room so that you can get around all sides of the work table. Put a trash can on one side of the stool, and a basket for your roving nests on the other. Leave room for a pile of fleece – I put mine to the right side of the metal carriage bolt I use for clamping the stationary comb. My chosen diz is placed to the left. That bolt is fastened securely with a nut and wing-nut arrangement into a hole drilled in my workbench. I can take it loose fairly easily, but once fastened in place, it stays put. I use a second nut to fasten down the stationary comb securely. You don’t want those steel spikes sliding around!
The workbench itself is a fairly heavy, height-adjustable steel bench with a footprint of 36 x 24 inches and an inch-thick fiberboard top bolted to the steel frame. A pierced metal shelf about 18 inches below the top holds tools and provides additional stability. Rubber feet protect the wood floor in my studio from scratches and keep the bench from moving around. As I recall, this bench cost me about $25 at a local home supply warehouse. A bar stool with a short back provides the needed height for comfortable work seating.
Pile up the fleece in your designated tabletop space. Don’t try to do more than a few ounces at a time; store the remainder in a bag or box until you’re ready to comb it. Remove one comb from the holder (most combs come with a holder – if yours didn’t, make one in a similar fashion to the scissor holders described above. Use heavy upholstery fabric or leather.) Walk around the table and carefully fasten down the stationary comb from the back – don’t try to work over the tines! Make sure the comb is secure before you move on to the next step.
Seat yourself and check the position of the trash can and basket. They need to be within easy reach. Turn off the ringer on the telephone and make sure anyone else in the house is both well-occupied and aware that you shouldn’t be disturbed for anything less than arterial blood flow. This is probably a good time to mention that you should have another driving adult within calling distance – accidents do sometimes happen, and a big component of safety is preparedness. If you’re alone, fasten a cell phone or cordless phone to your body (I put mine at the small of my back).
Now let’s review this setup. Your stationary comb is securely fastened to your work surface. Your traveling comb is still in the holder. A trash can is on one side of your stool, a basket for the combed top is on the other. The fleece is on the right of the stationary comb, the diz on the left. A phone or person is handy, but not in the way. You’re ready to go!
Begin to lash on locks of fleece. This is one of the most dangerous parts of the process. I pick up a lock or a handful of clean fleece and ‘comb’ it onto the stationary comb, holding the lock at the end opposite the one I’m lashing onto the comb. This lets me avoid placing my hand or wrist over the top of the spikes. Never load the combs more than half-full, and I normally stop loading when the tines are about one-third covered. This normally yields a 7-10 gram (about 1/4 ounce) strip of top; plenty to deal with at one time.
Now carefully remove the traveling comb from its holder and begin combing the lashed locks from the stationary comb. Work the traveling comb from left to right and right to left in front of your body. Avoid combing down toward your knees or up toward your face! Keep movements easy, but controlled. When most of the fleece has transferred, it’s time to clean off the stationary comb. Carefully place the traveling comb, tines to the side, on a clear space next to your diz. Then, working from the front, lift the short and trashy remainders from the stationary comb and put them into the trash can. Check the stationary comb to be sure it hasn’t loosened.
Pick up the traveling comb and begin combing the fleece back onto the stationary comb. Keep the traveling comb tines pointing to the side, as before. When the fleece has been transferred back to the stationary comb, lay the traveling comb down with the tines still pointing to the side and carefully push off any short, trashy bits onto the work surface; move the comb and brush the bits into the trash. Shift the traveling comb to a point-down orientation on the table or a pad and evaluate the locks on the stationary comb. Are they sufficiently combed? If not, repeat the process. When everything is combed and clean, it’s time to pull the top from the stationary comb.
Carefully slip the traveling comb back into the holder and put it back onto its shelf. Pick up the diz and tease a bit of the fluffy mass from the stationary comb through the hole. Working carefully from the front of the comb, pull off your top, allowing it to fall into the basket to the side of your chair. Once you have all the top pulled off, there will be some residue remaining on the comb. Working from the bottom, push this up the comb and onto the work surface. Then brush it into the trash.
Continue in this manner until you’ve combed for a half-hour. You’ll have at least 4-6 ounces of top at this point, and that’s a good stopping place. If you work for much longer than that, your hands will tire and your concentration will begin to wander – it’s no longer safe to continue. Unfasten your stationary comb and put it away. Even if you’re absolutely sure you’ll be coming back in an hour or so to continue combing, put that lethal tool away. You could stumble, somebody could come to the door and wander into the workroom, your beloved cat (or child) could jump onto the table. Take the time to walk back behind the table, unfasten the nuts, remove the comb and replace it in the holder.
Now what about the handheld combs? You aren’t always at your home work space; there are public demonstrations, and times when you just need or want to comb a little bit of fiber right there at the wheel. The handheld combs fit these situations beautifully. They’re also just the thing for very fine fibers like angora and baby alpaca. Just because they’re shorter and the tines are spaced closer doesn’t make them any less dangerous to use, though. I’ve had some nasty puncture wounds from my mini-combs, usually received when I’ve been trying to work entirely in my lap. I’ve learned the hard way that working next to a table is much safer. Lashing on can be done holding one comb in your less-dominant hand with tines pointed away from you, and combing the fiber on with the dominant hand, much as you do on a stationary comb. Again, don’t fill the comb too full – one-quarter to one-third full is plenty. Put the remaining fiber down and pick up the other comb from the tabletop where it’s lying sideways on top of the case with the tines pointing away from you. That puts the handle right there ready to pick up. Comb carefully, being sure to point the tines away from your body. This gets tricky during demonstrations, and the safety of your audience is another reason to work behind a table. Work mindfully; keep your attention on what you’re doing!
When you’re ready to pull off your top, put the traveling comb back on the holder, lying on the side with tines pointed away. If you can clamp the comb holding your top to the table, so much the better. If not, work slowly and cautiously, holding the comb with teeth pointing away from your body in your less-dominant hand and slowly pulling the fiber off in a strip. I’ve never managed to use a diz successfully on the hand combs, since a diz requires two-handed operation. And holding the comb handle between your knees is far from steady; sooner or later you’ll puncture yourself!
Again, put the combs back into their case the instant you’re finished with them. Even if you have enough sense not to touch them, there’s no guarantee that all of the people and animals around you are equally sensible. Do you have a child or grandchild or neighbor’s child or kitten that likes to jump into your lap? Horrible picture…let’s not go there.
Yes, I’ve seen spinners spin directly from the comb, both mini- and full-size, holding the comb in their lap. It strikes me as an accident, complete with emergency room trip and tetanus booster, ready to happen. But if you don’t mind needles and have good insurance, it’s your decision.
What about hand cards (picture from Schacht website)? They shouldn’t be all that dangerous – they’re basically wire brushes, right? Think again. I got my only fiber-related trip to the emergency room to date from a set of cotton cards. I was using one to flick-card locks of wool. I had a heavy piece of leather on my lap and was working on it. I got up for some reason, came back and sat down at my wheel, picked up a lock and the card, and proceeded to put approximately 100 small puncture wounds of about an inch deep into my thigh just above the knee. I’d forgotten to put the leather on my lap! Of course, I was spinning grease fleece from a freshly-shorn sheep in a public demonstration held in a barn. I didn’t remember when I’d had my last tetanus booster and I was 150 miles from home on a weekend. “Ouch” doesn’t begin to cover it. The doctor was quite blunt; “If you’re going to be fooling around with farm products, keep your tetanus boosters up to date.”
Even when used as designed for carding fiber, you can skin up your hands badly with a set of cards by using them carelessly. Again, give yourself lots of elbow room in an armless chair or on a stool. Set a basket for rolags on one side and a trash can on the other, and put the cleaned fleece within easy reach. Don’t overload the first card, and be careful where you’ve placed the second – put the carding cloth side down unless it’s sitting on a table out of reach of anyone else! Work carefully and mindfully, and as in combing, take frequent breaks with the cards properly secured. A small flick-carder is a wonderful tool for cleaning cards, but it can also take off hide! Secure it just as you do your cards; in a heavy cloth or leather sleeve.
A spindle is a lovely thing, small and useful. The beautifully-turned wooden ones are some of my favorite tools. The metal support spindles are perfect for spinning cotton and other short fibers. Sitting on one you’ve left on a chair, however, isn’t a lovely experience for either you or the spindle. At the least, you’ll break the spindle – at worst, you’ll puncture your tender hide. Make putting tools away in a safe place an unbreakable habit.
Spinning wheels are pieces of machinery. No matter how primitive and pretty they are, they are high-speed machinery. Stick your hand between the spokes on the wheel or in the path of the flyer when treadling, and you’re going to know about it! When you aren’t spinning, secure the drive wheel and flyer. I thread a ribbon between the spokes of my wheel and tie it around the flyer; that way both pieces are fairly immobile. If you don’t have a drive wheel with spokes, just tie the flyer to the mother-of-all.
Since spinning wheels are machinery, they require regular maintenance. If you have a wheel with sealed bearings, that’s one less place you must oil. But the wheel will work more smoothly if you lubricate a few places. Check your owner’s manual. If you bought the wheel second-hand, try this: Lubricate (I use 30-weight motor oil) any place where one part fits into or over another and any place where metal touches wood. I oil my Kromski Symphony every half-hour when spinning, and my Majacraft Rose every hour or so. I also dust and polish both wheels regularly, and tighten any loose nuts or connections as needed. These steps are simple, but they help make spinning a pleasure instead of a chore.
Now the spinning is done and you’re ready to knit. What other dangerous pieces of equipment will you be using? Believe it or not, a swift can be a source of small injuries. You can catch fingers or clothing in the joints, resulting in a painful pinch. If you aren’t careful to keep extra fingers out of the way, you can pinch them when adjusting the swift size to your skein. And you don’t want to get too close to a rapidly-revolving swift – they can give a painful knock to careless fingers or hands.
Before you start to use a ball-winder, be sure the central portion on which the ball of yarn forms is well-seated. Having them fly off is at least a nuisance, and at worst a projectile of odd and unpredictable path.
And now I’ll get to knitting needles. The hazards depend to a large extent on the material from which the needles are made. Plastic or casein isn’t much of a problem unless the needles are stiffened with wire. They’ll bend or break before they cause more than an “Ouch!” Wire-stiffened needles could deliver a painful jab or puncture before they bend.
Bamboo and wooden needles can splinter or break. Those jagged ends can cause real pain. You don’t want to sit on them. Also, unless regularly inspected and polished both bamboo and wooden needles can develop splinters down their length. This is more of a problem with long single-point needles than with shorter lengths. But splinters are never fun, and if you’ve been knitting unwashed wool yarn you again should be sure your tetanus boosters are up to date.
Metal needles are a no-brainer – of course they can hurt! Most of the time they’ll bend, but not before you have quite a bit more than an “Ouch!” to remember the experience.
My children learned early that needles and pins are sharp. Usually through opening the door to my sewing closet despite a ‘child-proof’ lock and the knowledge that the area was off-limits to them. What we sometimes disregard is that all needles and pins are sharp, including tapestry and yarn needles with so-called rounded points. You can get hurt with these simple tools, so treat them with respect.
My last admonition is just as common-sense as those above. Your fiber tools are tools – not toys! Tools should be maintained and stored properly so that they will function properly during use. Storage containers aren’t nearly as expensive as a single trip to the emergency room. Time is never so short that you don’t have enough to put away your tools. If nothing else, you can drop them into a bag and run for the door. Please be safe instead of sorry – your fiber pursuits will be pleasurable, guilt- and pain-free pastimes!
Monday, July 11, 2005
What Impacts My Knitting, or A Personal History
Or better yet, what parts of your past have impacted your knitting? I’ve been answering some questions from several sources lately about what impact various things have had on my fiber life. It’s a topic that invariably involves a visit to my past selves. In order to clarify my own mind, let’s take a quick trip back in time.
I grew up in what socialists call a turbulent time. I was born in 1955 in the fairly large Midwestern city of Cincinnati. My parents were immigrants from East Tennessee, where they had been raised in one of the poorer regions of Appalachia – Campbell County. Before I was really old enough to remember living in the city, we moved out into a farming community closer to my dad’s job.
My parents were both born during the early 1930’s, which made them Depression babies, and they both reflected the historical mindset that includes both the Depression and World War II. Security was very important, as was civic responsibility. Both my grandfathers were coal miners, with all the dangers and hardships involved in that career. They worked hard, saved what they could, and each bought some land of their own, which made them fortunate in that time and place. But life in coal-mining Appalachia was difficult, especially during the Depression years, and money was always hard to come by. So my parents grew up to take pride in their self-reliance.
My father left home after high school graduation (he was the only high school graduate in his family of seven) for a job in Detroit. He was drafted and served in the Navy during the last year of the Korean War and immediately thereafter. My mother left her Tennessee mountain home after graduation from the same high school as Daddy and found a job as a secretary in a small company in Cincinnati. She shared an apartment with her brother, sister-in-law, and a cousin or two to make ends meet. She and Daddy married the day after he returned from the Navy. Dad found a job in Cincinnati quickly, and they stayed there until 1961.
Then the President let them down. Dad’s job ended. Mother had been staying at home with my brother and me since my birth in 1955. Single-income families were still the norm then. Dad found another job in short order, since he was not only very good at what he did, but had also continued his education, adding the appropriate academic credentials to his resume. And we moved back to East Tennessee.
But it was an East Tennessee that was about as far as it could be from the rural county where Mother and Dad grew up. Our home was an hour’s drive - and 30 years - away from my grandparents’ houses. Oak Ridge, Tennessee is still called The Secret City, and then was called The Atomic City. My dad’s new job was at the most secret of the three facilities at that time – still known only by the acronym Y-12. We had no idea what he did, or where inside those high fences ringed with razor-wire and security personnel he did it. But that wasn’t really unusual. My schoolmates didn’t know anything about their father’s jobs, either. In fact, we rather looked askance at those children whose fathers had jobs anywhere other than ‘the plants’.
The 1960’s in Oak Ridge were a heady time. The Cold War was in full paranoiac flower, the various plants were in the forefront of all the high-tech advances in nuclear energy and the space race, jobs were secure, politics were liberally conservative, and good schools were important. There were lots of children of all ages, and school, church and civic activities comprised the social round for families. It was a good time to grow up.
Political discussion was largely restricted to the adult sphere. We kids were more interested in the space race. Security measures weren’t restricted to the plants – we walked home from school via back routes several times each year and practiced retreats to the school interior in case of attack. Yes, I remember where I was when JFK was assassinated – home from school with a stomach virus and watching the Dallas motorcade on TV from the living room couch. Very vivid memories of the motorcade, Johnson’s swearing-in, and my parents’ crying while watching the news that evening.
My childhood was great. My parents were young, gasoline was cheap, and we all loved to explore. We went to craft fairs, historical exhibits, museums, concerts and plays. I was always interested in the weaving and spinning exhibits, and Mother sometimes told us about our great-grandmothers, who had helped clothe their families through their efforts at wheel and loom. I would stand for an hour at a time, watching and asking questions. Those demonstrators were endlessly patient, especially in the face of my mother’s usual admonitions to hurry along. She had watched these things done often enough in her childhood to find them commonplace. I, on the other hand, was fascinated.
Vietnam didn’t affect me personally until my youngest uncle was drafted in about 1968. I was just about 15 – old enough to be very conflicted. I didn’t want my uncle to be put in harm’s way, but at the same time I was proud that he, like several of his brothers and my own father, was going to serve. Suddenly the TV newscasts were frightening and personal. And with the arrogance so normal to that age I decided that the war was wrong, and that the old men in the White House should stop it immediately. I proclaimed this attitude to everyone around me. To my parents’ credit, they listened and largely kept their own counsel.
Anti-war protests were never a part of my personal history despite my feelings, which were too mixed to allow public expression. I was interested in the counter-culture, but in a merely intellectual fashion. It all sounded good, but I had been deeply grounded in the idea that societal change comes only slowly, with a great deal of work from a solid majority of people within the system. Sometimes a through study of history does confer a little bit of perspective, even to a teenager.
The feminist movement did strike a chord, and I became not only interested but involved. The movement was gearing up around the time I was looking for my first part-time job, and I was quite incensed that the only things available to me were low-paying clerk or baby-sitting jobs, while my younger brother was offered much more lucrative pay as a construction gofer. I had grown up helping to do the same remodeling projects that he had, I was larger and stronger than he was at the time, yet these men dismissed me entirely because I was a female! My parents supported the feminist movement from a sense of fairness, so I wrote letters to congressmen and senators and wrote school papers on the societal benefits that would ensue from the passage of a constitutional amendment.
I was a member of the very first group of 18-year-old voters. I eagerly registered and exercised my franchise, and have voted in almost every election since. If I do decide to miss voting, I have an uncomfortable flashback to my dad saying, “Your vote may not make a difference; but if you don’t register your opinion, you have no right to complain about what is done in your name.”
Watergate and Nixon imparted an awareness of the evil that can be done by politicians in the name of national security and a pronounced cynicism regarding the actual worth of all politicians. I’m part of three generations that saw their faith in their own government severely shaken. I think we’re still dealing with the repercussions, and will continue to do so for the foreseeable future. In a strange way, Watergate appeared to deliver the final blow to the counter-culture movement of the late 1960’s and 1970’s. I offer no explanation, just the observation that it appeared to be so.
So what do these personal reminisces about various historical events have to do with fiber? Indirectly, quite a lot. My parents’ upbringing impacted my own. We moved back to Tennessee when I was 6, and I started to school here. I spent all the time with my mother’s parents that Mother and Daddy would allow. A household with an aunt who was close enough to my own age to be a playmate was a plus, as were the uncles who were only slightly older than their baby sister. It was much more fun than a household containing only one slightly younger brother with whom I had little in common.
My great-grandmothers also lived with my maternal grandparents. I hadn’t been around a lot of older folks at that point, and I really enjoyed getting to know these ladies, even though at first I was a little afraid of them. My Grandma Lay, in particular, was still quite spry physically, and was quite upset that neither my aunt nor I had received what she considered necessary basic instruction in needle arts. She saw this as a job to be done, and took it on. By the end of the next summer she had made sure we had the rudiments of quilting, embroidery, crochet and knitting. She and my great-grandmother Reese had been spinners and weavers in their younger days, and her spinning wheel and loom had come with her to my grandparents’ home. But there was no room for her to set them up; they languished in a storage shed that burned down shortly after her death.
My grandmother took over our needlework instruction after Grandma Lay died. Once I had progressed beyond the rudiments in sewing, Mother took over and refined my skills in that area. I am now a proficient seamstress, due in no small part to her sometimes impatient but always proficient tutelage. I designed and made Halloween costumes for my children, designed and sewed my hand-wovens into garments and ecclesiastic paraments, and am an adequate quilter and embroiderer because of her. But I seldom have the passion for a sewing project that I do for other pursuits.
I was always more interested in laces. Grandma Reese always had doilies, handmade and carefully blocked and starched, on her tables under the lamps and pictures. Some were crocheted, some knitted. She changed them out seasonally, and would add to them when she found a pattern she liked. Grandma enjoyed making lace, and did as much of it as she could. Many people were recipients of her skill – handmade lace trims on a sheet and pillowcase set were a “welcome to the family” gift for most of her six daughters-in-law and a few of her granddaughters.
Since I inherited Grandma’s body type and eyes, I suppose it was only reasonable that I get her love of lace as well. That passion for lace has led me in some strange directions through the decades. I couldn’t knit English fashion with an even-enough tension for my great-grandmother. So I dabbled at knitting, but didn’t become proficient until I re-learned Continental fashion knitting in my 40’s (after I learned to spin). Between my early teens and my late 20’s, I crocheted. Around age 30, I finally learned to tat. Those two skills kept me happy for years. But eventually I became quite expert at both, and maintaining a skill doesn’t require the same sort of attention and practice that is necessary for learning. Mine is a curious sort of mind, continually in search of something new to discover and explore. I inherited that from both parents, and they nourished it happily, as I attempt to continue doing today.
My mid-30’s ushered in a decade of health problems. In order to keep my brain functioning while dealing with those health problems and my growing family (a daughter and two sons were born between my 29th and 33rd years) I began to explore weaving. Beginning with a rigid-heddle loom, I quickly progressed to 4- and then 8-harness floor looms. Suddenly a whole new lace world opened up! I happily explored 4- and 8-harness lace weave structures, and then bought a used 14-harness countremarche loom and continued my explorations. I juried into a prestigious guild, turned down membership in a national guild due to a lack of time, and had fun learning.
Loom laces led to bobbin lace, and I played with that for awhile – just long enough to decide that it didn’t blend well with a household of children and their assorted animals. I’ll get back to it, but probably not until after all the cats and dogs have left! What a curious kitten can do to an uncovered lace pillow is heartbreaking. I still maintain an IOLI membership, though, and have quite a file of ‘someday’ projects.
Selling my 4-harness floor loom led to an invitation to assist in beginning a local fiber arts guild, and that membership opened the door to my next passion. I learned to spin on a toy wheel top-whorl drop spindle during a weekend-long public demonstration at a local museum. I was supposed to be weaving – had commented several times that spinning took too long, and there was no need with all the lovely yarns and threads available commercially. But when I got my hands on the wool and tasted the magic of making yarn, I was hooked! A couple of weeks later I found a handmade Saxony wheel for sale and bought it. It was much too fast a wheel for a beginner, and I didn’t really have room for it, so I sold it and bought a used Ashford Traveller. I’ve spun hundreds of miles on that wheel. Later I added a Majacraft Rose, and now a Kromski Symphony – I finally made room for another Saxony wheel!
My grandmother lived long enough to cheer me on in my explorations. She took great pride in my return to my family roots, often telling me (and my cousins) how proud she was that there was another tatter, spinner and weaver in the family. I was always proud to make her something special once I’d reached a certain level of mastery of a new skill, and when she died my aunt told me that all those gifts were in a special drawer, carefully pressed and folded. I understand that there were some arguments between the various aunts about their disposition. I do know that I didn’t get any of the pieces back!
My mother has displayed a certain ambiguity about my adult explorations, although she encouraged my crocheting and sewing as a child and teen. She didn’t really see why I wanted to weave, was rather resentful that I’d mastered tatting when she couldn’t, and still doesn’t understand my spinning. But she’s become more reconciled to my avocations through the years, realizing, I think, that these things are as important to me as her quilting is to her.
I can trace my life in the pieces of my work that surround me. The crocheted trims on my mother-in-law’s guest towels and the matching framed doilies on her walls always remind me of the early days of my marriage. The crocheted and framed elaborate fine cotton doily that hangs in my mother’s living room is a reflection of the balance I’ve always strived to maintain between my roles as daughter and daughter-in-law. Mother also uses and displays various woven pieces, and brags about the handspun Shetland, originally-designed rectangular shawl I made for her this last Christmas. As my mother-in-law does the similar piece I made for her the year before!
A framed piece in the entry of my home shows how I blended two passions – I cut and hemmed a small circle of hand-woven fabric, then trimmed it with tatting. The shawls thrown over various pieces of furniture, the hand-woven dishtowels in my kitchen, and the various pairs of lace-patterned socks I wear happily attest my skills. And show their progression.
I have an office decorated with family photos and pieces of my work. A hand knitted, wide-brimmed hat hangs on my office wall surrounded by a hand-painted, hand woven silk scarf with beaded fringe. My coffee cup rests on a tatted circular doily. A space-dyed and spun silk cap has been knitted into a lamp shade. A continually-changing family photo montage is pinned on a piece of hand woven fabric on my bulletin board. It all works. Shortly after moving in, I was told that my office was the prettiest in the entire project!
I can look around me at home or at work and see the results of my own creativity. I look at a piece and remember what I was doing and feeling when it was made. Memories are in those pieces. The ages and stages of my children, my marriage, and my life are reflected in my hand work. I’ve shared those passions with my children and husband. All of my children know how to spin and knit and tat and weave, even though only my youngest son has actually completed more than a single project, or shows any inclination to continue practicing the skills. But the other two may come back to it later in their lives – I did. My husband has started cross-stitching, and loves doing it for all the same reasons I love my own fiber pursuits.
Now I’m beginning to work on projects for my grandchildren. My first wedding ring Shetland shawl was made for my first grandson. I’m now knitting very small socks and sweaters between shawls, and showing the next generation how to do some things like baking and spinning. It may strike a chord, it may not. But it will be fun! And perhaps, when they’re a bit older, they’ll be part of the next generation of fiber artists.
Subscribe to:
Posts (Atom)